Starting editing process for podcast
During the Christmas break, I started editing the podcast. I started importing the two clips and putting clip 1 onto the editing track. I went through the clip and added text for each question, with different templates for it to look appealing. I also throughout the editing process was cutting out some of the long pauses to make the podcast flow better. As I was going through the clip I was thinking about what I could add to make the podcast more engaging for views on YouTube. This would consist of zoom-in, text, music, and more. Some of the clips would fit with a certain style of editing and engagement to make the video flow.
The overall vibe of the podcast is to make important information less serious so people who struggle with fitness and health, in general, would make them feel less stressed about what information we are talking about. Our presenters were joking, laughing, being themselves, and making the whole topic less serious as people can exercise and take care of their health without being so serious. After all, people who do sports and exercise professionally always say to have fun, which is why people get into fitness because they enjoy it.
Screenshots while editing:
Creating titles
When I was going through the clips I was creating titles when our presenters were reading out the question. This was helpful when knowing what questions our presenters were going through in detail and giving their honest opinion and solutions for their answers. For the titles to be unique I used different templates, which were provided by my editing software and had different effects, fonts, and colours. This would make the video more effective as every question would look different. This also helped me personally as if I only planned to edit for an hour I could edit up to a certain number of questions, and when I go back to edit the next day I would know where I am up to. This was one of the structures I created myself so I did not get too overwhelmed while editing.
Adding effects and transitions

After I cut out parts that I did not want in my edit for example pauses, and clips I did not want, and added titles for all of the different questions, I started to add effects and transitions. As I would mention later in "Benefits and drawbacks of editing the podcast" I had to change software because my old one kept on crashing when rendering the podcast once I had edited the full podcast. As I did not know much about this software I did not know how to 'zoom in and out' on clips. The way I overcame this issue I watched a tutorial. This tutorial was really good and easy to understand and follow. After I watched this I started to add zoom in and outs on clips throughout the podcast.
Adding background music
Adding background music is important and it can give a health podcast a little more motivation and does not make it feel like people have been talking for hours. The type of music I picked was calm and uplifting which I feel went very well with the podcast. As you can see I did not do much with editing the music I just put the volume level low so it was not too high for the listeners and watchers to not be able to hear the presenters. All of the different options you can see were all auto and I did not change them, as I felt like I did not need the music to fade at any point. For all of the music I used in this podcast, it is all copyright free as I used the 'YouTube audio library' which is a free and safe way to use music in videos and podcasts, as they are from YouTube themselves. This guaranteed you to not get copyrighted for any video or podcast. Adding music as an effect
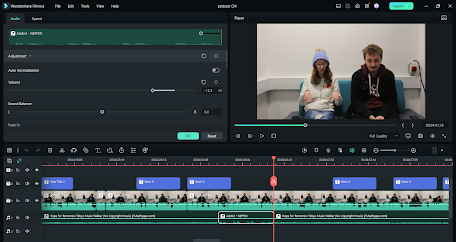
As you can see on the music track I have two different music audios and this is the only time I did this. I added this type of 'rock' genre of music into this particular part of the podcast. As our presenters mentioned music helps people with working out and something with a high beat such as rock, pop punk, and alternative genres can help with motivation. This is because when the high beat of drums comes in it can make you hit everything in the beat which can improve everything while exercising such as time and speed. I added in this type of music just so people watching and listening to the podcast get an understanding of what our presenters were meaning by music and specifically rock.
Starting editing process of TV advertisement
On this day I started to edit the TV advertisement. I first started by importing all of the footage. I did a few hours when I was free to get a start on it. These are all of the screenshots I got during this time of editing.
What I do want to include in the edit are some transitions that make the montages of workouts flow. I want to add different types of music that fit the mood of the clips. This is because it will show their motivation and dedication to exercise.
Ordering clips in the timeline
As I knew this was a TV Advert I knew that it should not be long, having all of these files that had different camera angles and workouts. To deal with this I went through the clips and the ones I wanted to use I would put onto the timeline. This make it easier and more organised and I knew that if I did not think these clips went well together I could use the ones I was thinking about using.
As you can see from the screenshot I added some dialogue that relates to what happens next. I did this when I edited the 'Western Shootout short film' and this looked perfect as every dialogue went well together. The reason I did this was it shows what the teenager was doing before and after scrolling through TikTok. All of the clips in this timeline were unedited they were all in their original form as I wanted to see what it would look like before I edited the clips.
While I was getting clips together and in some sort of order I realized that I did not download all of the clips I needed. I then went back and looked through some of the clip's names that might be relevant to what I needed. This made it a lot easier for me to find them. Once I found the clips I would have needed I look through them to make sure and then downloaded them and added them to the timeline at the right place. This made the TV advert flow better and understand what was happening at this moment.
Cutting out pauses

After I got all of the clips and in the right order for where I got up to I started to use the razor tool. This tool is one of the most used tools I use while editing as it allows me to cut off parts of a clip that I do not want to use. As you can see in the screenshot the cut-up clip that has a white border, is the clip I am going to remove. This is because some of the pauses I got were not needed and this was one of them. This would make the TV advertisement flow better and make the audience more engaging and understand the purpose and story.
Changing clip order
Even though before I started to edit I had all of the clips I wanted. This was not the case as I found another clip to use instead of the one I had in the timeline. The clip that I wanted to add was the one about the other clips in the timeline. This clip was not much different from the one I already had in the timeline, but the actors added more communication that I felt went better with the clips I already have. I kept the clips in the same order and just made enough space to add this clip. I thought I had all of the clips I needed and wanted to be in my TV advertisement this was a good decision and made me realize that at first, I don't always have my idea of the final product as changes and little details can make a massive impact on my idea of a completed project.
Adding in transitions
I was at part of the editing process when I wanted to add some transitions to make the TV advert more entertaining. I mostly put the transitions in montages of learning and doing TikTok dance scenes. This was because I did not want the montage to look repetitive and not motivating for people watching this TV advertisement. Transitions would make people also understand how much time editing I did for the right moment and putting the clips altogether I also felt like adding in transitions was a good idea as it does not look like all of the clips were just put together and that's it. It shows that there was an effort in the editing process and it also breaks up the advert and shows the different progression of the teenager in the advert.
Adding background music
As you can see this is one of the final elements I do for editing this TV advertisement. I added some background music to make it less quiet for the non-talking parts and for the talking parts. This music was lowered right down as you can't see in this screenshot. I lowered the music to where you can just hear it as I did not want the music to fully power the message of the TV advertisement and the audio of the TikTok clips, which I did have an issue with but more on that in the "benefits and drawbacks of editing the TV advertisement".
Adding in NHS better health campaign
As this is a TV advertisement I thought that this would be beneficial to add to the NHS Better Health campaign poster. I added this at the end of the TV advertisement instead of at the start or during the video. This was because I normally see them at the end with important information in TV advertisements. This is obviously not the case for every type of TV advertisement but I felt like this was the right idea for this type of TV advertisement.
The tools I used to edit the podcast and TV Advertisement
I edited both of these projects on Filmora 12.
The tools I used to create these projects were "quick split mode", this allowed me to cut out anything that I did not want and allowed me to split the clips. This helped me to make the TV advertisement and Podcast flow better. This tool is also known as the "razor tool".
The select tool allowed me to select clips for me to move. This was helpful as when I removed a clip it meant that I could move it to join the other clips. This tool as well as the "quick split mode" was the most used.
I used the "title" tool to make all of the questions appear on the screen. This tool I used this a lot as it meant that I could separate each question from the other and it meant that the podcast would flow but still make sense. For the TV advert, I used the title for the dialogue to show what the teenager was doing. This was helpful to show the different stages of getting motivated.
I also used the volume tool to make the volume louder for people speaking and to lower the background music. I did this for both projects.


Comments
Post a Comment